


If you’re experiencing issues with your website or email server, odds are you’re experiencing an error related to the Domain Name System (DNS). This system allows internet computers to communicate by translating human-friendly domain names (like blog.example.com) into numerical IP addresses.
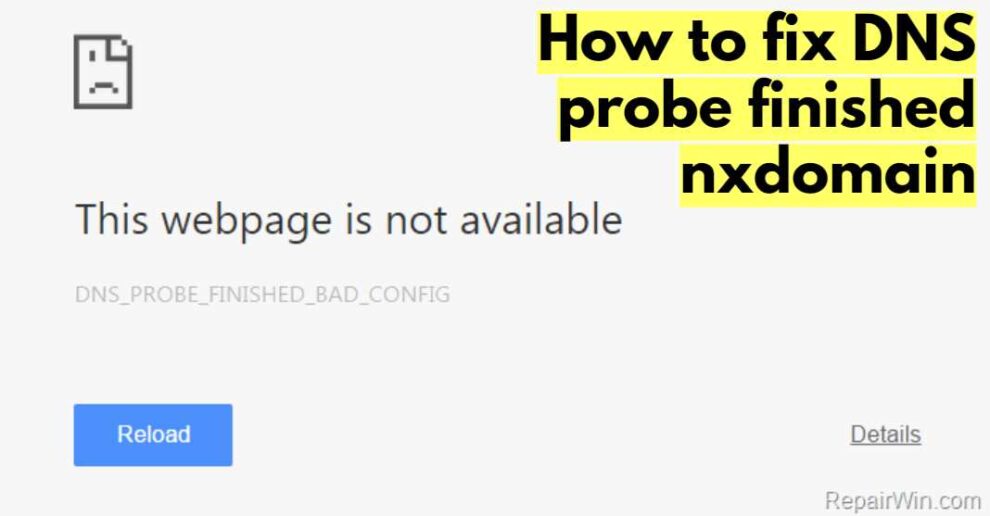
In most cases, DNS errors are harmless. However, if your website is hosted on a server that needs to be configured appropriately or your website’s traffic is high enough, DNS errors can cause your website to stop working. Google Chrome users encounter a standard error when browsing a web page: “This website cannot be reached – The server IP address was not found,” along with DNS_PROBE_FINISHED_NXDOMAIN. This can be very frustrating as suddenly you can’t go to a website or anywhere.
If you see the said error while trying to access a website, don’t worry. Check out the following recommendations on how to reconnect. This post will discuss the most common DNS errors and how to fix the DNS probe finished nx domain error.
What is a DNS probe, and why is it important?
Domain Name System (DNS) is a protocol that allows devices on the Internet to resolve domain names to IP addresses.
One of the main tasks of DNS is to resolve A records (the primary type of DNS record) for domain names. An A record is a pointer to a resource on the Internet. For example, if you enter the domain name www.google.com, your computer will look up the A record for google.com and send the request to that IP address.
A DNS probe is a particular DNS query type used to test a DNS server’s health. Your computer will default send a DNS probe whenever it connects to the server. If you’re experiencing problems with your DNS server (for example, you’re getting the “Domain Name System (DNS) probe finished NXdomain error”), you may need to fix the DNS probe.
What is the “DNS probe finished NXdomain”?
When a user types a URL into a web browser, DNS connects that URL to the server’s IP address. This is called DNS name resolution and involves a DNS recursor that queries various nameservers to find the server’s IP address. The DNS_PROBE_FINISHED_NXDOMAIN errors can occur when DNS cannot resolve a domain name or address. The NXDOMAIN part represents a nonexistent domain.
What causes the “DNS probe finished NXdomain” error to occur?
Several possible reasons your system might face the BNS Probe Finished NXdomain error.
- Your web browser cannot find the target website since it is not registered or has expired.
- The domain is not pointing to the IP address.
- Your computer’s DNS settings are misconfigured, such as not being able to resolve the domain.
- A VPN or antivirus software is interfering with your network settings.
- The problem comes from your ISP.
- You entered the wrong page name in the search bar.
- Cannot access due to an internet connection error.
- A firewall is blocking access to the website.
Solutions to Fix “DNS probe finished NXdomain” error.
When you try to visit a website that you’ve never visited before and receive the “DNS probe finished NXdomain error,” it’s likely because your DNS settings are incorrect. When you type in a website’s address (for example, www.example.com), your computer contacts a DNS server to translate the website’s name into an IP address. If the DNS server can’t find the website or can’t find the correct IP address, the DNS probe finished NXdomain error message will be displayed.
Here’s how to fix it.
-
DNS Settings Proper Configuration
Configuring the DNS settings helps fix the DNS Probe Finished NXdomain error by ensuring that the domain’s Internet Protocol (IP) address is correctly entered in the settings. This allows the computer to locate the IP address for the domain, which is necessary for it to connect to the website. Without the correct IP address, the computer will encounter the DNS Probe Finished NXdomain error when it attempts to access the website.
Below are the steps to properly configure your computer’s DNS settings:
- Open your computer’s “Control Panel.”
- Click on “Network and Sharing Center.”
- Click on “Network Connections.”
- Right-click on the connection you’re using to visit the websites you’re having problems with and select “Properties.”
- Under the “General” tab, click on “Internet Protocol Version 4 (TCP/IPv4).”
- In the “Properties” window, click on the “Configure” button and then select “Use the following DNS server addresses.”
- Type the IP address of your primary DNS server in the “Primary DNS Server” field, and type the IP address of your secondary DNS server in the “Secondary DNS Server” field.
- Click on “OK” and then restart your computer.
2. Reset Computer DNS Settings.
Resetting the computer’s DNS settings can resolve the DNS error by replacing the existing DNS settings with fresh ones. This will help to flush out any corrupted or outdated settings that could be causing the error. This can also ensure that the computer uses an up-to-date DNS server which is necessary for proper domain name resolution. Additionally, it helps to update the computer’s local cache, which may be out of date and causing the DNS Probe Finished NXdomain error.
To reset your computer’s DNS settings, follow these steps:
- Open the “Control Panel” on your computer.
- Select “Network and Internet.”
- Choose “Network and Sharing Center.”
- Select “Change Adapter Settings.”
- Right-click on the active network adapter, then select “Properties.”
- Now, select “Internet Protocol Version 4 (TCP/IPv4)” and choose “Properties” again.
- Select the option to “Use the following DNS server addresses.”
- Enter the new “Preferred and Alternate DNS server addresses.”
- Select “OK,” then “Apply.”
- Restart your computer and check if the “DNS probe finished nx domain” error is resolved.
3. Flush DNS Cache
Every time a user visits a website, a temporary copy of the data packet is stored in the system. These temporary packets of data are called caches because they make it easier for you to reconnect to the website when it’s reloaded in your browser. Therefore, you should clear the cache and reload the website to avoid errors.
When you clear DNS caches, all the previous entries on websites on the system are removed. This helps reset the connection and fix several errors and bugs within the system.
Steps to flush DNS cache on Mac
- Open the “Terminal” application by searching for it in Spotlight.
- Enter the command “sudo killall -HUP mDNSResponder” and press return.
- Enter your administrator password when prompted and press return.
- Enter the command “sudo dscacheutil -flushcache” and press return.
- Enter the command “sudo killall -HUP mDNSResponder” again and press return.
- Restart your Mac.
Steps to flush DNS cache on Windows
- Open the Command Prompt via the Start Menu, right-click, and select “Run as Administrator.”
- Type in the “ipconfig /flushdns” command and press Enter.
- Reboot your system and check if the error is resolved.
Step to flush DNS cache on Google Chrome.
- Open the Chrome browser and enter “chrome://net-internals/#dns” in the address bar.
- Click on the Clear host cache button.
- Exit the browser and reopen it to confirm the DNS cache is flushed.
- If the error persists, visit the website in a different browser to check if the issue is browser-specific.
4. Restart DNS Client Service
Restarting the DNS client service can help fix the DNS Probe Finished NXdomain error by refreshing the DNS settings on the device. This can help the device connect to the internet by re-establishing the connection with the DNS servers. Doing so may also clear out any cached DNS entries which could be causing the error. Additionally, it can help the device update its DNS records, allowing it to detect the website’s IP address and properly connect to it.
That said, if you are on Windows, there are three ways to restart the DNS client service of your system. Below are the steps to all three ways.
Via Windows Service Manager
- Use “Windows key + R” to access the Run box.
- Then, type ‘services.msc’ into the box and press Enter.
- Scroll down to find ‘DNS Client’ in the list.
- Right-click on ‘DNS Client’ and select ‘Restart.’
- After the service has restarted, try to reaccess the website.
- If the error message still appears, try resetting your network adapter.
Via Command Prompt
- Open Command Prompt as an administrator in the Start Menu and select “Run as administrator.”
- Type “net stop dnscache” and press Enter. This will stop the DNS Client Service.
- Type “net start dnscache” and press Enter. This will restart the DNS Client Service.
- Close the Command Prompt.
- Try loading the webpage again. Try another solution if the “DNS Probe Finished NXdomain” error persists.
Via Windows System Configuration
- Open the Windows System Configuration utility by typing ‘msconfig’ in the search bar or accessing it through the Control Panel.
- Once the System Configuration window appears, click on the ‘Services’ tab.
- Scroll down the list of services and locate ‘DNS Client.’
- Check the box next to ‘DNS Client.’
- Click ‘Apply’ and then ‘OK.’
- Restart your device for the changes to take effect.
- After your computer reboots, you should restart the DNS Client service, and the ‘DNS Probe Finished NXdomain’ error should be resolved.
5. Change DNS Servers
Changing DNS servers helps resolve the DNS Probe Finished NXdomain error by allowing users to access DNS servers with more up-to-date records. DNS records contain the mapping between domain names and the IP addresses of their respective web servers. When the DNS server accessed by the user has outdated records, it can cause the DNS Probe Finished NXdomain error. By switching to another DNS server, the user can access more up-to-date records and potentially resolve the issue.
Steps to change the DNS server in macOS:
- Open the System Preferences window.
- Click the Network icon.
- Select the active network connection from the left menu.
- Click the Advanced button in the bottom right corner.
- Select the DNS tab.
- Click on the “+” button to add a new DNS server.
- Enter the new DNS servers and click OK.
- Click on the Apply button to save the changes.
- Test the new connection by running a DNS lookup.
- If the DNS lookup succeeds, the DNS Probe Finished NXdomain error should be resolved.
Steps to change the DNS server in Windows:
- Open the Control Panel on your computer (Search for Control Panel in the Start Menu).
- Navigate to Network and Internet > Network and Sharing Center > Change adapter settings.
- Now, right-click on your chosen active network adapter and select Properties
- Click on the option for Internet Protocol Version 4 (TCP/IPv4) followed by Properties.
- Select the “Use the following DNS server addresses” option and type in your desired DNS server addresses.
- Click OK to save the changes.
- Restart your computer and try to reaccess the website.
Steps to change DNS servers in Google Chrome:
- Open the Chrome browser.
- In the address bar, type in “chrome://settings/network” and enter.
- Click on “Change Proxy Settings.”
- Select the “Network” tab and click on the “Settings” button.
- Under the “Network Settings” section, find the “DNS Server” option and set it to “Automatic.”
- Click on “OK” to save the changes.
- Click on “Apply” and “OK” to confirm the changes.
- Restart your browser, and the “DNS Probe Finished NXdomain” error should be resolved.
6. Reset Chrome Flags
Resetting Chrome Flags resets specific settings that may be causing an issue with DNS lookup. Several factors, such as server settings, lookup settings, or a failing connection, can cause this error. Resetting the appropriate Chrome Flags can reset incorrect settings and allow the user to connect successfully to a website. For example, resetting the “Maximum Tiles” flag can help the browser load the website more quickly, and the “DNS Prefetching” flag can help to speed up DNS lookups. Resetting Chrome Flags can be done by navigating to chrome://flags in the address bar and then resetting the desired flags to their default settings.
Steps to reset Chrome Flags:
- Open Google Chrome and type “chrome://flags” into the address bar.
- Scroll down to the “Experimental QUIC Protocol” flag.
- Click the drop-down menu and select the “Default” option.
- Scroll to the “Experimental Web Platform Features” flag.
- Click the drop-down menu and select the “Default” option.
- Scroll to the “Network Prediction” flag.
- Click the drop-down menu and select the “Default” option.
- Scroll to the “Predict network actions to improve page load performance” flag.
- Click the drop-down menu and select the “Default” option.
- Scroll to the bottom and click the “Relaunch Now” button.
- Once Chrome has restarted, check to see if the “DNS Probe Finished NXdomain” error has been fixed.
7. Reboot Internet Connection
Rebooting an internet connection refreshes the connection to the internet. This allows the DNS server to reset and get the most updated information and can help resolve any issues causing the error. Additionally, rebooting the internet connection can help clear the DNS cache, which can also help resolve the DNS probe finished NXdomain error.
To reboot your router, first, find the power switch on the back of the router and turn it off. Please wait a few seconds, then turn it back on. Once the router is back on, wait for the connection light to turn solid green. This indicates that the router is connected to your internet service provider.
8. Disable VPN and Anti-virus temporarily.
When you temporarily disable VPN and antivirus, it prevents potential conflicts between them and the network settings. VPN and antivirus software can sometimes interfere with network connections, leading to DNS errors. By disabling them temporarily, you can see if they are causing the DNS error, and if so, find a solution to fix the conflict.
Steps to disable VPN in macOS:
- Open System Preferences from the Apple Menu.
- Select Network.
- Select the VPN connection you wish to disable.
- Click the “-” button to remove the VPN connection.
- Click Apply.
- Restart your Mac.
Steps to disable VPN in Windows:
- Open the Windows Control Panel.
- Click on “Network and Internet.”
- Select “Network and Sharing Center.”
- Choose “Change Adapter Settings” from the left-hand side menu.
- Right-click on the VPN connection and select “Disable” from the drop-down menu.
- Close the Network and Sharing Center window.
- Restart your computer.
9. Check Local Hosts Files.
As a solution to the DNS Probe Finished NXdomain error, you can check the local host files that allow users to manually override their DNS server’s response to a specific domain name. This can be done by adding the domain name and associated IP address to the local hosts file. This will bypass the DNS lookup process and allow the user to access the website.
Steps to Check local hosts files in macOS:
- Open Finder and navigate to the “Go” menu in the top menu bar.
- Select “Go to Folder” from the menu.
- Type “/etc/hosts” in the text field and enter.
- If prompted, enter your computer’s password.
- Open the “hosts” file using a text editor.
- Review the file’s contents to ensure that any entries are correct and up-to-date.
- If any entries are incorrect, delete them from the file.
- Save the changes and close the file.
- Restart the computer to ensure that the changes have taken effect.
Steps to check local hosts files in Windows:
- Launch the Windows Start menu and search for “Notepad.”
- Right-click on the Notepad icon and select “Run as administrator.”
- Select “File” from the menu bar and select “Open.”
- Navigate to the directory: C:\Windows\System32\drivers\etc
- Select “All Files (*.*)” from the file type drop-down menu and then open the “hosts” file.
- Look for and remove any unnecessary entries in the hosts file.
- Select “File” from the menu bar and select “Save.”
- Close Notepad and restart your computer.
10. Turn off CDN.
When you turn off CDN (Content Delivery Network), it can fix the DNS Probe Finished NXdomain error by ensuring that the domain name is not being cached. CDNs are typically used to cache content so that it can be quickly served to users. Sometimes, the CDN may cache an outdated DNS record, resulting in the NXdomain error. Disabling the CDN will force the CDN to look up the latest DNS record from the authoritative source, which should resolve the error.
11. Renew IP Address.
Another solution to fix the DNS Probe Finished NXdomain error is renewing the IP address, which helps by clearing any old, incorrect DNS information stored on the local machine. This will reset the DNS settings and allow the machine to obtain new, updated DNS information from the server. It can help resolve DNS issues, such as the DNS Probe Finished NXdomain error, by providing the machine with the correct DNS information to resolve the domain name.
Steps to renew IP address in MacOS:
- Open System Preferences.
- Click on Network.
- Select the active network connection and click on Advanced.
- Click on the TCP/IP tab.
- Click on the Renew DHCP Lease button.
- Confirm the changes and allow the Mac to renew the IP address.
- Check if the “DNS Probe Finished NXdomain” error is resolved.
Steps to renew IP address in windows:
- Open the Command Prompt window through the Start menu and type “cmd.”
- Type in “ipconfig /release” and press Enter to release the current IP address
- Type in “ipconfig /renew” and press Enter to renew the IP address
- Type in “ipconfig /flushdns” and press Enter to flush the DNS server cache
- Type in “netsh winsock reset catalog” and press Enter to reset the Windows Socket
- Restart your computer to finish the process.
In a Nutshell
Overall, this post is all about fixing the DNS probe finished NX domain error. We all know that sometimes things can go wrong with DNS, and our computers can’t resolve certain domains. Following this guide can resolve the issue and get back to work.


Add Comment