


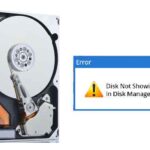


Frequently, complaints or reports of internal hard disk drives not detected have been made by multiple users. Basically, it means the hard disk is not showing in Windows 11.
There are many reasons for a hard disk drive not being detected, which we will discuss below. Also, some valuable solutions for how to fix hard disks are not detected.
Affected users have also said that even the replaced and new HDD is not showing up in the BIOS settings. For a long time, this has become a common issue for almost every Windows version. Suppose the HDD is not performing the necessary actions that it is intended for. In that case, the system cannot integrate the needed components as it should as per the command.
HDD not showing up in the disk management is expected even for the external hard drives. For essential purposes, external HDDs help store data and backups of information as a preventive measure. The common cause for the issue could be defective hard drives, incompatible drivers, or faulty USB drives. If the device is defective, it is bound to cause errors in the system.
We know how frustrating and confused you can get when you plug the HDD or SSD into the system, but it does not get detected. This issue is common in Windows 7, 8.1, 10, and 11 versions. While we will get into the solutions in a while, knowing the problem occurs in the first place would be helpful.
Reasons why your hard disk drive is not showing up in the disk management
To resolve the issue, it is essential to identify why the problem is happening in the first place. So, we have investigated and found some plausible causes for it. These causes are pretty responsible for hard drives not detected in the system.
So, here are a few possible causes of the issue at hand.
The device identified the new HDD as a foreign disk.
When you replace the old HDD with a new one, some processes can adjust the disk in the system. For whatever reason, at times, the device may not identify the new HDD. This mostly happens when the installation of the device is not correct. Hence, it would not show up in the Disk Management Utility.
Also, Read – How to fix a MacBook that Won’t Boot.
Defective SATA cable
If the hard disk drive is not showing up in the BIOS settings but is responding to the Device Manager, the cause must be a faulty SATA port or cable.
Corrupted SATA driver or improper installation
A corrupted SATA driver cannot detect the internal hard disk drive in the system. Or, if the SATA driver (RAID) installation is not rightly done, this issue may arise. In that case, you should try uninstalling and reinstalling the driver again from the official motherboard manufacturing site.
An issue with the Windows connection
ATA channels in the system can hamper the HDD and SSD drives from responding. If so, deleting all the ATA channels from the system might resolve the issue.
While these are the most common causes for HDD not getting detected, let’s find ways to troubleshoot the problem now. Keep applying any solution that seems fit until the issue is resolved.
Fixes to the “HDD not showing up” error in Windows 11
The solutions listed here are verified to resolve the hard disk drive not showing in Windows 11 or other Windows versions. These solutions will work accordingly based on the root cause of the issue.
Primary connection checks.
When you start your computer or laptop, the system starts processing all the programs and the connected devices. Suppose the connection is not good. The system cannot recognize the HDD. If the SATA port or cable is defective, your HDD will go undetected by the system.
To eliminate this issue, here are fixes to computer connection problems:
- If the cable is faulty, replace it with a new one and connect to the PC.
- If your PC is not working or not detecting the hard drive, try connecting it to a different working PC.
- If the HDD has a self-switch, rebooting it might work.
- Plugging in the external HDD is the correct USB port for your PC.
This resolution basically asks you to verify the connection of the HDD to the system. You have to check if all the necessary cables are connected in the right places or not. Misplacing or switching the wires and ports cannot detect the hard drive plugged into the device.
Before you try applying this resolution, ensure that your hard drive is even turning on or not. For external hard drives, there will be some light indicators. If that light is blinking or is on, it would mean that the HDD as a unit is not defective. After switching to another port and cable, if the external HDD stops blinking lights or the fan stops running, the issue is with the cable or ports.
Update drivers
If the system does not detect the HDD, a faulty or outdated device driver can be the cause. If so, you should upgrade to a new one directly from the driver manufacturer’s site.
Here is how you upgrade or update the device driver with Windows Update:
- Open your computer and go to the device “Settings.”
- Navigate to the “Update & Security” section > select “Windows Update” > tap on the “Update & Security” tab.
- Click on the “Check for updates” option under the “Windows Update” section from the menu.
- If there are any latest Windows available, it will be displayed on the screen. Download and install the newest version if there is indeed any Windows update.
- Now, go back to the “Device Manager” window.
- Find the disk drives or hard drives in the menu.
- When you find it, right-click on the needed ones and click “Update Driver.”
This activity will update the device driver on your computer. You can then restart your device and proceed as needed to check if the problem is solved or not.
Solution 3: Uninstall and reinstall the hard drive drivers
If nothing is wrong with the HDD or the cables, you can try uninstalling and reinstalling the hard drive drivers in the system. Follow the steps here to do so:
- Launch the “Device Manager” window on your laptop.
- Find and double-click on the “Disk drives” from the menu.
- Choose the “Uninstall device” option on the list of the needed hard drive.
As the hard drive drivers get uninstalled, restart your computer. The driver will then automatically be reinstalled again to the device.
Verify the HDD status
Checking the HDD status on the Device Manager will tell you if something is wrong with the drive. Here’s how you fit the hard drive status of your computer:
- Open your computer’s “Device Manager” and go to the “Disk Drives” section.
- Please select the required hard drive from the list and right-click on it.
- Select “Properties” from the options.
- As the particular drive’s properties window is displayed, you can check the status under the “General” tab. If there is any potential issue, an error message will be shown.
If there is no issue with the hard drive, you must find the cause and apply the right solution as needed.
Check the BIOS settings
Sometimes, even if the hard drive is detected in the BIOS settings, it may not show up in the Disk Management. If that is the case, you may want to follow the following processes:
- Reboot your PC and get to the BIOS settings by pressing either of the keys depending on the system’s model – F1, F2, F10, Del, or Esc key.
- Navigate to the “Boot Device Priority” tab when you get there. Check if the hard drive is detected or not in the list.
If the HDD is detected in the BIOS, use a different SATA cable and port to connect the hard drive to the computer. If that works, your hard drive will show up in Disk Management.
However, suppose the HDD is not showing up in the BIOS. In that case, you must manually enable the drive in the BIOS settings.
- First, disconnect/remove the hard drive from the PC and reconnect again.
- Press the applicable key to enter the BIOS settings of your PC after restarting the system.
- Go to the “Setup” tab and verify the drive status. If it is off, turn it on.
Format the external HDD.
Since the HDD is not detected in the File Explorer, formatting the drive in Disk Management is another probable solution. For that, follow the steps right below:
- Open your PC’s “Rub” dialog box by pressing the “Windows + R” keys simultaneously.
- Enter “diskmgmt.msc” in the space of the dialog box and hit the “Enter” button.
- That will get you to the “Disk Management” window.
- Now, select the HDD that is facing the issue. Right-click on it and select the “Format” option.
- You will then be prompted to enter some details to confirm the format activity of the HDD. Enter details regarding volume level, allocation unit size, and file system. If you want a quick format, tick the given box. Finally, hit the “OK button.
This activity will likely resolve the external hard drive not detected in the Windows 11 error. This solution will, however, apply if the hard drive is showing in the Disk Management but not in the File Explorer.
Remove the ATA channel drivers on your PC
Many users who have encountered this issue of HDD not responding in the Disk Management said that deleting the ATA channel drivers from the PC tends to work. That means you must remove them all from the ATAPI/IDE ATA controllers.
After deleting these ATA channels, the system will automatically configure the needed from scratch again when you restart the PC. Here’s how you can proceed with this solution:
- Open the “Device Manager” on your PC.
- From the drop-down menu, click on the “IDE ATA/ATAPI Controllers” tab.
- Now, select the ATA channel and right-click on it. From the options displayed, click on the “Uninstall device” option. Proceed to remove all the available ATA channels likewise.
When you are done, reboot your PC and verify the action in Disk Management again.
Import foreign disk from Disk Management
When the system identifies the hard drive as a foreign disk, it will not show up in Disk Management. You can rectify this problem by importing a foreign disk. For that, you have to configure the system by adding the disk so that data becomes accessible. Follow the steps below:
- Open the “Run” dialog box by pressing the “Windows + R” keys simultaneously.
- Type “diskmgmt.msc” in the given space and hit the “Enter” key to open the Disk Management window.
- Now, check if there is any other disk present under the OS disk under the “Disk Management Utility” tab. If there is, you might notice an exclamation-type icon.
- Right-click on the disk with an exclamation icon and select “Import Foreign Disks” from the options.
- After a few minutes, you will see a new HDD as a volume file in both File Explorer and Disk Management.
Install SATA (RAID) drivers
Any problem with the existing SATA driver will cause the external hard drive not to get detected in your Windows 11 system. You can try fixing the driver issue by installing the latest and updated SATA (RAID) driver directly from the motherboard manufacturer’s website.
First, determine your PC’s motherboard manufacturer and its model. Now, search if any new version of the SATA driver is available. If yes, download it from the official website. Once the download is complete, double-click on the executable installation file and follow the instructions as needed.
As the new SATA (RAID) driver installation is complete, reboot your PC when you recheck the Disk Management after startup, you will see the HDD.
Conclusion
An HDD or SSD is a crucial component of a computer system. Suppose that it is not working or getting detected by the system. In that case, many programs and activities cannot be performed on the device. Not resolving it soon will lead to system failure or even data loss. We hope these solutions will help fix your HDD not showing in Disk Management error.


Add Comment